


Podcast editing shapes a raw recording into a finished episode by cutting mistakes, removing noise, and balancing levels. For beginners the core steps are trimming dead air, removing filler, cleaning noise, and evening out volume. Descript covers all four by letting you edit the transcript and strip noise and filler in a click.
You planned your podcast, brainstormed topics, did your research, conducted some interviews, and recorded your first episode.
Now what? It’s time to edit. We can’t overstate the importance of editing. The post-production process transforms your recorded podcast into a finished product that dazzles listeners and makes your podcast seem credible out of the gate. It’s the difference between, say, an untouched hunk of rock and a beautiful, refined sculpture.
How does podcast editing work?
Putting a podcast on the digital airwaves takes more than just recording it, trimming it a bit, and shipping it of—it’s a lot of work to carefully craft a narrative and make sure that it all sounds amazing for your listeners.
Luckily, there are many easy-to-use audio editing applications that take the struggle out of editing (like Descript, naturally)—but it’s still important to learn the basics of podcast post-production. Here’s a quick rundown of what you can expect to tackle when editing a podcast.
Audio editing
This is the process of refining what you’ve recorded by looking for mistakes and polishing the overall audio experience.
As you edit, you’ll remove anything you don’t want, or that isn’t necessary (like that tangent you and your guest went on about marine mammal husbandry). By cutting, trimming, and moving bits around, you’ll also build your story into a more cohesive whole.
Sound design
Music and sound effects are both part of your sound design, and interweaving them into your podcast adds layers of emotional heft and brief moments of respite from heavy dialogue.
Think carefully about what kind of image you want your podcast to project and tailor your sound design appropriately. Listen to some popular podcasts and make note of when they use music as a background note or bring it into the foreground, and how they use effects. This will help you understand how to effectively use sound design to your advantage.
Mixing and mastering
When dealing with multiple tracks of audio from different sources (like when you’ve done a podcast interview), you need to ensure each component comes in at the same level. Doing so prevents listeners from having to constantly fiddle with the volume and improves the overall audio quality of your podcast.
There’s a lot that goes into this, from using compression to adjust volume levels and using an equalizer (EQ) to tweak certain frequencies, so we made a full guide to mixing sound to help.
How to edit a podcast (7 steps from an expert)
We sat down with Descript's Managing Editor, Ashley Hamer, to talk about editing. She says, first and foremost, that you should never be afraid to edit. “The podcasts that are well-edited are the ones that you don’t notice are well-edited,” she said. “If you notice the editing, that’s a sign it’s not well done.” Take the following steps to clean up your podcast.
Step 1. Remove background noise
Not everyone has a professional podcast studio to record in, and there are probably a lot of noises in your environment that you’ve become accustomed to—computer fans, the gurgle of a fish tank, or that neighbor with a leaf blower.
These might not bother you in your day-to-day, but if they pop up in your podcast recording, they’ll certainly distract your listeners. The good news is editing tools provide filters that can remove or lessen background noise. Even if you recorded your podcast from the back of your co-host’s van on your AirPods, you can use Descript’s Studio Sound feature to make it sound like you were recording in a pristinely soundproofed studio.
Step 2. Remove some filler words
While you want your podcast to sound natural, you don’t want your listeners to struggle to find the point amid false starts, pauses, and filler words like “um” and “uh.”
When deciding how much filler to cut, Ashley says a good rule of thumb is to ask yourself, “Are they distracting? If someone is repeating the same word over and over and over as kind of a vocal tic, or because they’re nervous, that’s something you can take out.” Removing these extraneous utterances will tighten up your audio, making the speaker sound more concise, confident, and intelligent.
But you don’t need to remove every filler word. If a pause or a “like” makes the conversation sound more natural, keep it. As Ashley notes, “We use a lot of these words to help ourselves communicate; they’re not just filler. You have to use your best judgment, but if you think the words are a natural part of the conversational flow, then keep them in.”
Descript can remove your filler words automatically. In your dashboard, click the Action icon at the top of your transcription and select Remove filler words… Choose your removal option, and Descript will handle the rest.
 |
💡 PRO TIP: Need to restore a removed filler word? Go to Edit > Undo or press Command + Z (MacOS) or Control + Z (Windows). If you use the “Ignore” function, you can also restore the word at any point by highlighting it within the transcript and clicking the Strikethrough button in the top toolbar.
Step 3. Delete unwanted material
Podcast editing is ultimately about finding your story and removing what doesn’t serve the story. Still, Ashley recognizes that cutting out material is hard for some people. “That’s a big thing for beginners—especially if they have a guest that they hold in high esteem. They don’t want to take out their words. But it’s your show. You should be able to create the story you’re looking for and make it interesting to the audience, which you know best.”
Listen first and, once you get a sense of the story, you’ll know what parts feel superfluous. Remove those. As Ashley notes, it’s definitely possible to go overboard in editing. But you also don’t want to deliver “the raw file where you’re awkwardly meeting the guest and talking about how you scheduled the interview. Nobody needs that.”
Step 4. Clean up volume levels
When combining tracks from multiple sources, such as multiple sides of a conversation or parts of an ongoing interview that were recorded separately, you’ll find the volume levels of each track tend to vary.
This can be hard on your listeners, who will have to frequently reach for the volume, either so they don’t miss things that are too soft, or so they don’t blow their eardrums out from parts that suddenly get too loud.
Adjust each track’s level to create a more even listening experience. This is also where you'll want to use compression, which will raise the quiet parts and lower the loud parts within the same track to produce a generally even volume level.
You can check the stereo audio level of your podcast episode using the volume unit (VU) meter in your DAW. Your sound should be in the middle. Low levels make your sound hard to hear; high levels might clip, distort, or simply overpower other voices.
 |
📚 Learn: How to mix audio: A complete guide
Step 5. Add sound effects and music
You might already have a tone in mind for your podcast—be it smooth and intimate, funny and raucous, or informative and journalistic. Your use of sound effects and music will help enhance that tone, keep listeners engaged, and even create a mood that evokes a feeling in the listener. Imparting information is an important part of podcasting, but if you can make your audience feel something, their listening experience becomes more personal.
A travel podcast could feature the sounds of a bustling market or the “whoosh” of a plane taking off. A cooking podcast could have some knife chopping or sizzling sounds to bring the experience to life. Be creative, but remember to stick to what’s appropriate.
In Descript, you can browse a royalty-free stock music and effects library.
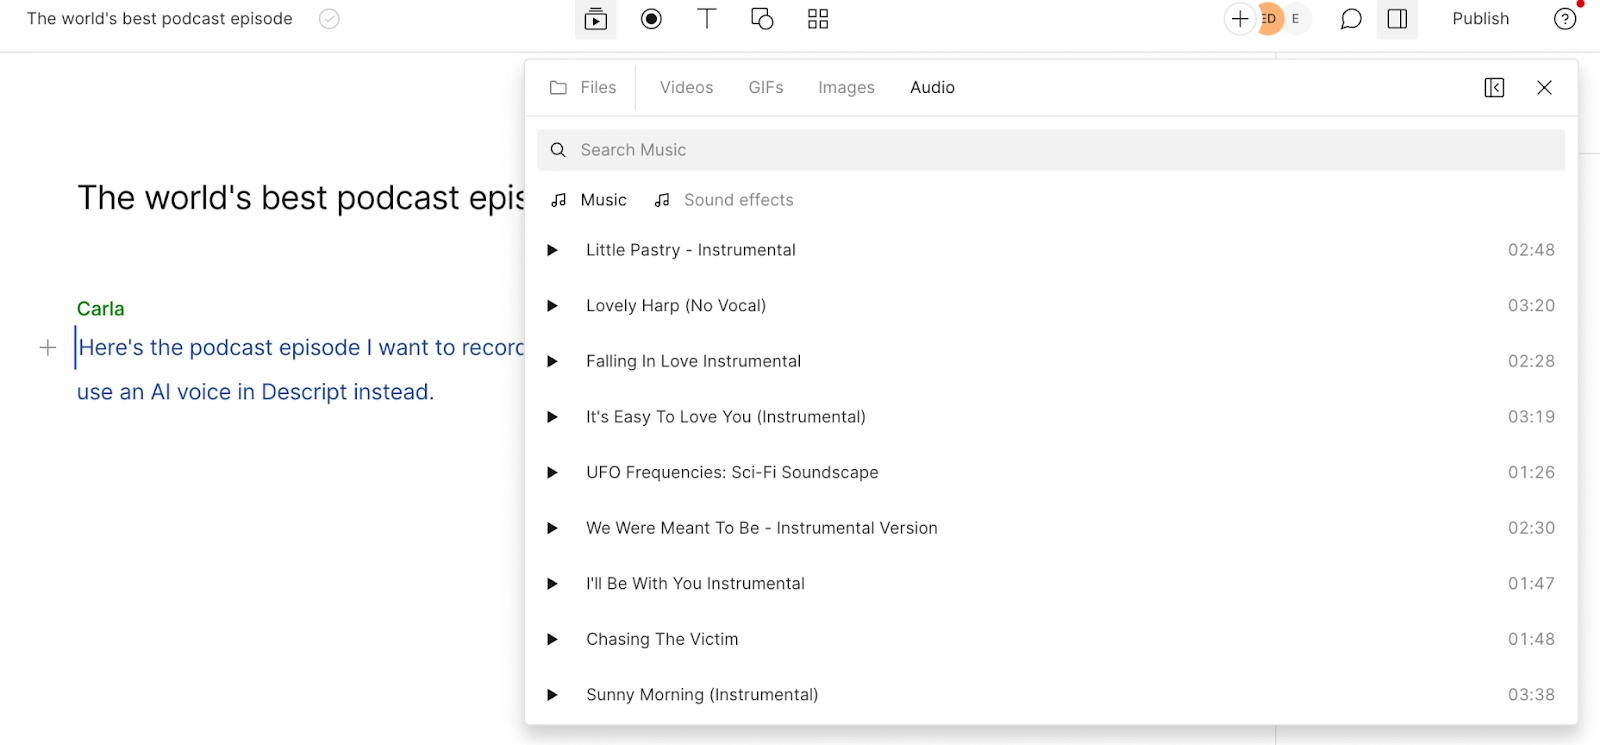 |
To find background music for your podcast intro, just click one of the options and listen to how it sounds. If you don't like it, go back to the library and find something you like better.
Step 6. Create intros and outros
Every good story has a beginning and an end, and your podcast script should, too. That's why you'll want a recognizable intro and outro to let your audience know what they're listening to and when it's over. Your intro doesn't need to be complicated—it can be as straightforward as Michael Barbaro’s: “I’m Michael Barbaro. This is The Daily.").
Step 7. Listen and then re-listen to your material
According to Ashley, listening is an often overlooked step in the editing process and it’s the only sure way to catch mistakes. It may seem like a lot of work—and you might think you know what’s in your material since you’re the one who recorded it—but there’s no substitute for experiencing it as your audience will.
“Listen to your podcast once before you touch anything, and then again after you think you’re done editing,” recommends Ashley. In taking the time to listen for the pieces that grab you and seeing how they’ve come together after the edit, you’ll be rewarded with a quality podcast you can publish.
5 podcast editing tips to sound like a pro
You’ve seen the steps. Here are a few real-world tips for producing episodes that actually sound professional.
Tip #1: Overplan
Much like in video editing, good audio editing begins even before you step into the studio. The more organized you are, the easier it will be when you record and ultimately when it comes time to edit your show.
That means things like:
- Over-researching the topics you want to discuss.
- Knowing the points you want to make or the direction you want a discussion to go.
- Planning out interview questions with follow-up and backup questions.
- Practicing your podcast script ad nauseam.
Regardless of what sort of podcast you’re creating, overplanning can help save you headaches later down the road.
Tip #2: Find a good space to record
A good recording space with a decent podcast microphone will sound better than a noisy space with a high-quality microphone. Nothing beats a quiet room with good noise insulation.
Choose a room with carpets, curtains, and upholstered furniture as they naturally absorb sound. You can also put acoustic panels on the walls to reduce echo and reverb.
Tip #3: Learn how to speak into a mic
Believe it or not, there is technique when it comes to speaking into a microphone. Being too close can lead to issues like plosives (hard sounds that create a burst of air, leading to a popping sound) and excessive bass. Being too far away can result in a thin, distant sound where ambient noise may become more prominent.
When preparing your microphone:
- Position yourself around 6 inches from the microphone.
- Make sure to turn away or move back when laughing or yelling.
- Soften your plosive sounds—gently turn your head when saying words with “p” or “b.”
- Smile while you speak to sound more friendly.
- Eat an apple if your mouth is dry.
- Keep water nearby (but make sure it’s not carbonated—you don’t want to burp!)
Different microphones have different sweet spots. Look up what sort of angle and distance works best for your microphone. The manufacturer should have recommendations.
Tip #4: Take notes while you record
Every time you flub a word or your cat decides to bump your microphone, take a peek at the time code in your podcast editing software and write it down somewhere.
That way you don’t have to scrub audio to find the mess-ups you want to edit out. And every time someone says something poignant or funny, write down the timestamp so you can highlight that section out as a social media clip.
Taking simple notes will not only save you a lot of time during editing, but it can also help you write your show notes and episode description when you publish your show.
Tip #5: Don’t overedit
Remember, this medium is made for the ear only. There are no visuals to help your listeners make sense of things. In that respect, try to keep things simple. This will depend on the type of show you’re creating, but in general, if a transition or sound effect doesn’t add anything to the story or topic, take it out.
The best podcast editing tools
There are a lot of choices when it comes to podcast editing software. Below, we’ll highlight Descript — an all-in-one, AI-powered platform — plus a note that several desktop editing programs are also available if you prefer to do it manually.
Descript
Descript is an all-in-one podcasting tool that allows you to record, edit, and even publish all from one place. Using AI technology, Descript auto-transcribes your audio files, auto-removes filler words, and even overdubs spots that need polishing. But Descript’s claim to fame is its doc-style editing feature that allows you to edit audio simply by adding or deleting words in your transcript.
The entire podcast production process has a streamlined workflow. After you record and edit your podcast, Descript will even allow you to publish directly to a number of podcast hosting platforms, like Podbean, Captivate, Buzzsprout, and Transistor.
And if you ever want to move into creating a video podcast, Descript has you covered there as well. More AI features like AI-generated green screen, Eye Contact adjustment, and text-to-speech make Descript ideal for content creators.
Descript offers a free account and several pricing plans starting at $12 per user per month. Getting started with Descript is easy. Open a free account and start editing.
How to choose the best podcast editing software
When evaluating the right podcast editing software for you, it’s important to consider your current comfort level with audio editing tools and how much power you really need.
For example, if you’ve never even trimmed an MP3 file, you might want to start simple. But keep in mind that no matter how much you do or don’t invest in editing software, you’ll be able to give your podcast a thorough edit. Here’s what to look for in a podcast editor:
A robust editing interface
Look for a visual, timeline-based editor that lets you edit multiple tracks, cut and paste clips, adjust audio levels, and easily apply filters and EQ to individual tracks.
At some point, you’ll also probably want to do things like cut silences, remove filler words, move sections around, and drop in re-recorded audio or pre-recorded clips. If your editor makes these things difficult, your editing process will take longer.
The ability to use transcripts
“When editing an interview, one thing I’ll always do as I listen is write down timestamps of when things happen. If that’s already laid out in front of you, that gets one big step out of the way,” says Ashley.
Descript is an audio and video editor built entirely around transcripts, something none of the other commonly used podcast editing tools have. However, Ashley notes, “one pitfall of editing from a transcript is that you may not know how it’s going to sound. If you edit something as if it should be a complete sentence, you need to give it a listen — maybe the speaker cut off a word, or maybe it makes more sense for that sentence to start with ‘So…’ or another filler word, because that’s how they spoke it.”
Advanced filtering and mixing
Your recordings aren’t always going to be perfect, but with the right software, they don’t need to be.
Make sure the editor has a noise reduction tool and even a room tone generator — a tool that can isolate and reproduce a standard tone for background noise in a speaker’s room across a track. That way, sections that have been clipped won’t stand out if the background noise varies. You also want compression and EQ, so you can make sure the volume is at a consistent level across each episode.
Something that fits your skill level and doesn’t break the bank
There are many advanced audio applications that have all the bells and whistles needed for editing, mixing, and mastering that you’d find in a digital audio workstation in a professional studio.
Many of these higher-end features—such as the ability to accommodate hundreds of tracks or record sound retroactively—are nice to have, but not worth the cost for podcast editing. You don’t want to become bogged down in an interface festooned with options you’ll never use. Keep it simple and keep it right for you.
Podcast editing FAQs
Is podcast editing difficult?
Podcast editing is only difficult if your software is challenging or your raw recordings are chaotic. Using a user-friendly editor makes the workflow smoother, and setting up a quiet place to record — while planning your content — reduces post-production headaches. With Descript’s automatic transcription and intuitive interface, editing can feel more like revising a doc than wrangling waves of audio.
How long does it take to edit a 30-minute podcast?
Several factors shape your total editing time, including audio quality, how many speakers or tracks you have, and your own editing experience. Still, here’s a standard rule of thumb: editing often takes about two to three times the length of your raw audio.
In other words, if you recorded two hours of sound to create a 30-minute show, expect about four to six hours’ worth of editing to get a polished result.
Which software is recommended for podcast editing?
Descript is an all-in-one platform for high-quality audio editing that’s easy to learn. It includes automatic transcription, AI-powered cleanup features like Studio Sound, text-based editing, and publishing options. Whether you’re a beginner or experienced podcaster, you can create professional-sounding episodes with minimal effort.
Can I use AI to edit my podcast?
Yes. AI-based tools can handle time-consuming tasks like removing filler words, adjusting volume levels, and improving voice clarity. Descript uses features like Underlord or Studio Sound to quickly refine your audio with minimal manual effort, so you can focus on telling a good story.
How much does it cost to have someone edit a podcast?
This depends on episode length, the number of edits, and professional rates. Some editors may charge a flat fee per episode, while others bill hourly. Simple edits might cost less than highly produced, narrative-style podcasts. Get a clear quote upfront to avoid surprises.
How much do podcast editors get paid?
Rates vary widely based on experience and the complexity of a project. Many freelance podcast editors charge by the hour or by finished audio minute, and their rates can range from modest fees for beginners to higher premiums for those with extensive experience and a strong portfolio.


