Technology is improving fast—so fast that now, you hardly need special audio equipment for a good recording. You just need a smartphone.
With your Android device, you can record a podcast, interview, or even capture the audio playing on your computer.
Your device’s built-in microphone may not deliver the crisp and clear audio you’d get with higher-quality recording equipment, but it gets startlingly close. And the right settings can make a huge difference in your device’s ability to capture quality sound.
Whether you want to capture a conversation or enhance a video recording with a natural-sounding voiceover, we’ll show you how to record audio on Android devices using built-in tools and third-party audio recording apps.
Can I record audio on Android?
Of course you can — if you’ve got a phone in your hand, you’ve already got a decent recorder. Your built-in voice recording app can handle audio-only captures, or you can use Android’s screen recorder if you need video, too. You can also download a third-party app from the Google Play Store if you want more advanced features.
Your phone's built-in microphone can do basic recording impressively well, but if you want truly professional-sounding audio, you’ll want to use an external audio source, like a wired or Bluetooth microphone.
Most audio recording apps are free and user-friendly, and offer basic recording and editing functionality. They also let you export recordings to other services so you can save, share, or do more advanced editing.
For example, you can record audio on your Android phone or tablet, import the recording to Descript to edit and remove filler words, add sound effects or music, and then export it in your preferred audio file format.

Descript automatically transcribes audio files using artificial intelligence (AI), so you can edit the transcript like a Word doc, and Descript will edit the underlying audio to match. The result will be a polished audio file you can save to your device, share with others, or export to various podcast hosting platforms.
How do I record audio on Android?
Recording on an Android phone is easy — open your phone’s built-in voice recorder or download a free app, tap Record, and watch (or listen) to the magic happen. Below, we’ll walk you through the details and a few tips for getting great sound.
Note: The instructions below apply to a Samsung Galaxy phone, but should work with most Android phones. However, each handset may have slightly different names for things like settings and other options.
Step 1. Open the Voice Recorder app
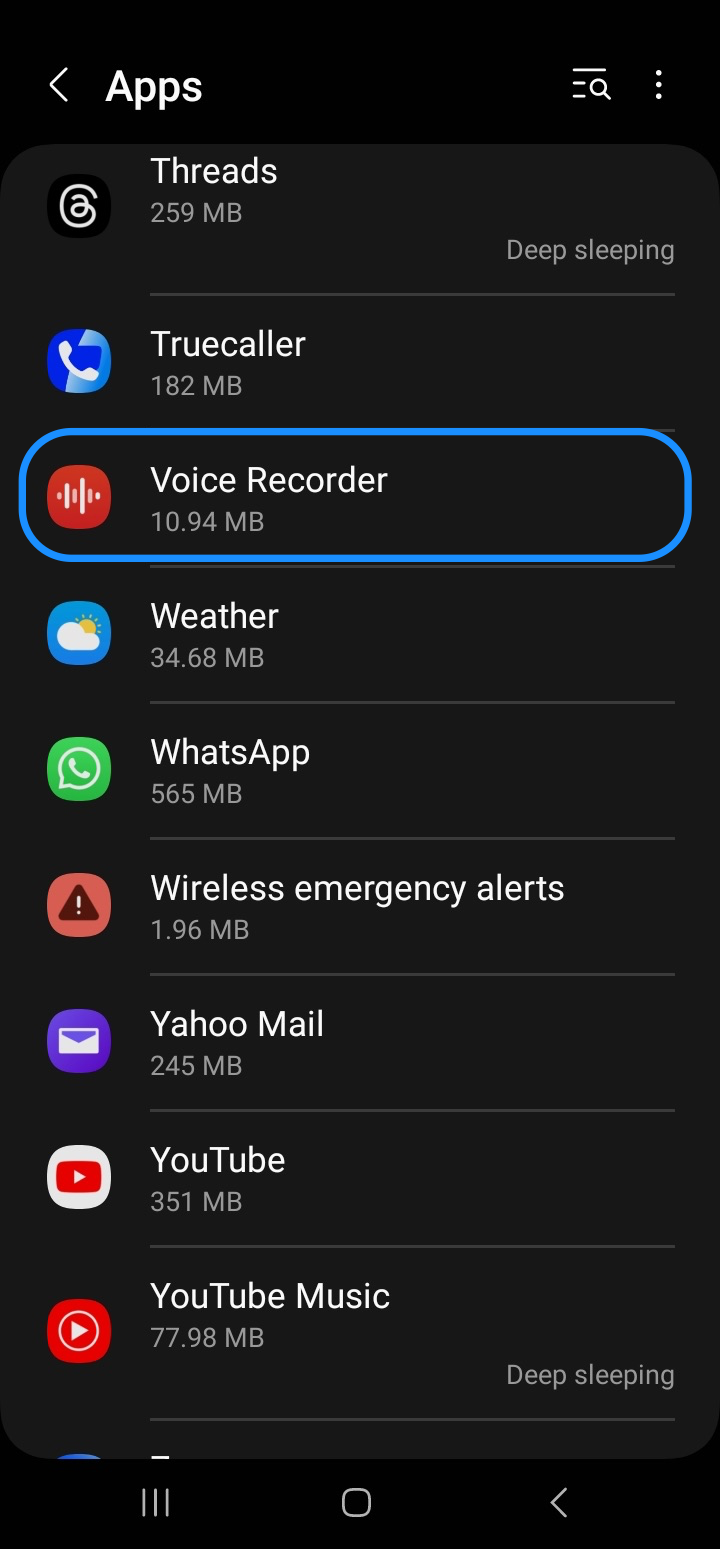
Find the Voice Recorder app on your Android device (some models may call it Audio Recorder or Recorder). If you don’t see it on your home screen or in your apps list, tap Settings > Apps and search for it by name. Each phone brand can differ slightly, so if you still can’t find it, consider installing a third-party app (we’ll recommend a few later).
Note: Most Samsung Android smartphones or tablets ship with the Voice Recorder app. If you can’t find the app, download it from the Google Play Store or the Galaxy Store.
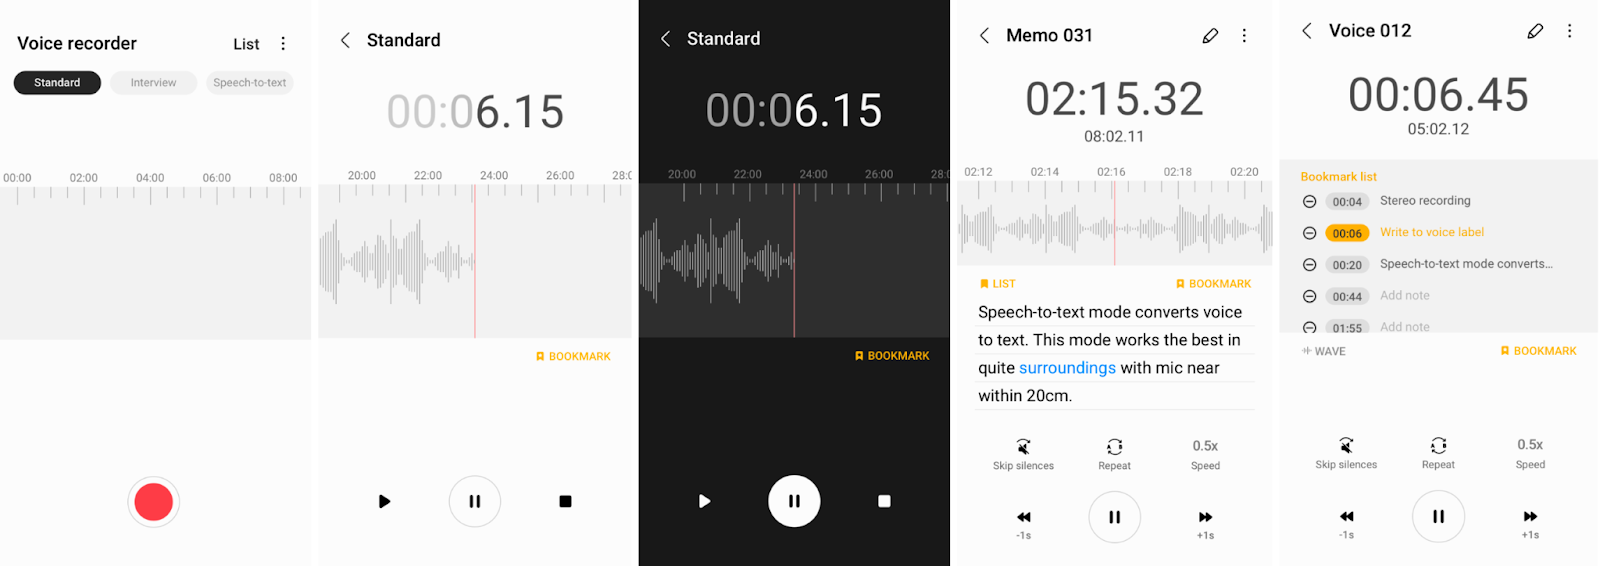
Depending on your Samsung Galaxy model, you can choose between Standard, Interview, or Speech-to-text recording modes.
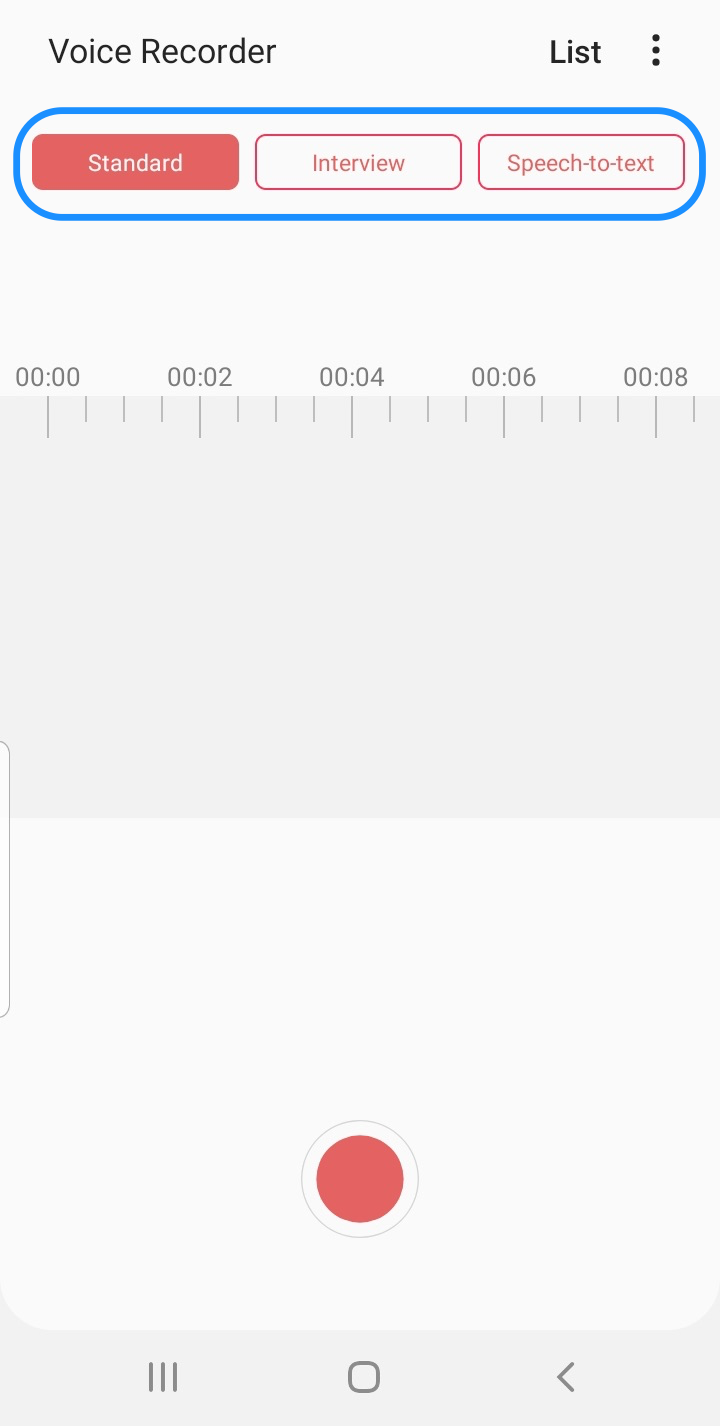
- Standard mode: Offers a simple interface and is ideal for basic audio recording.
- Interview mode: Uses your device's top and bottom mics to capture you and your interviewer/interviewee's voices. It displays dual waveforms—one for each mic—as you record.
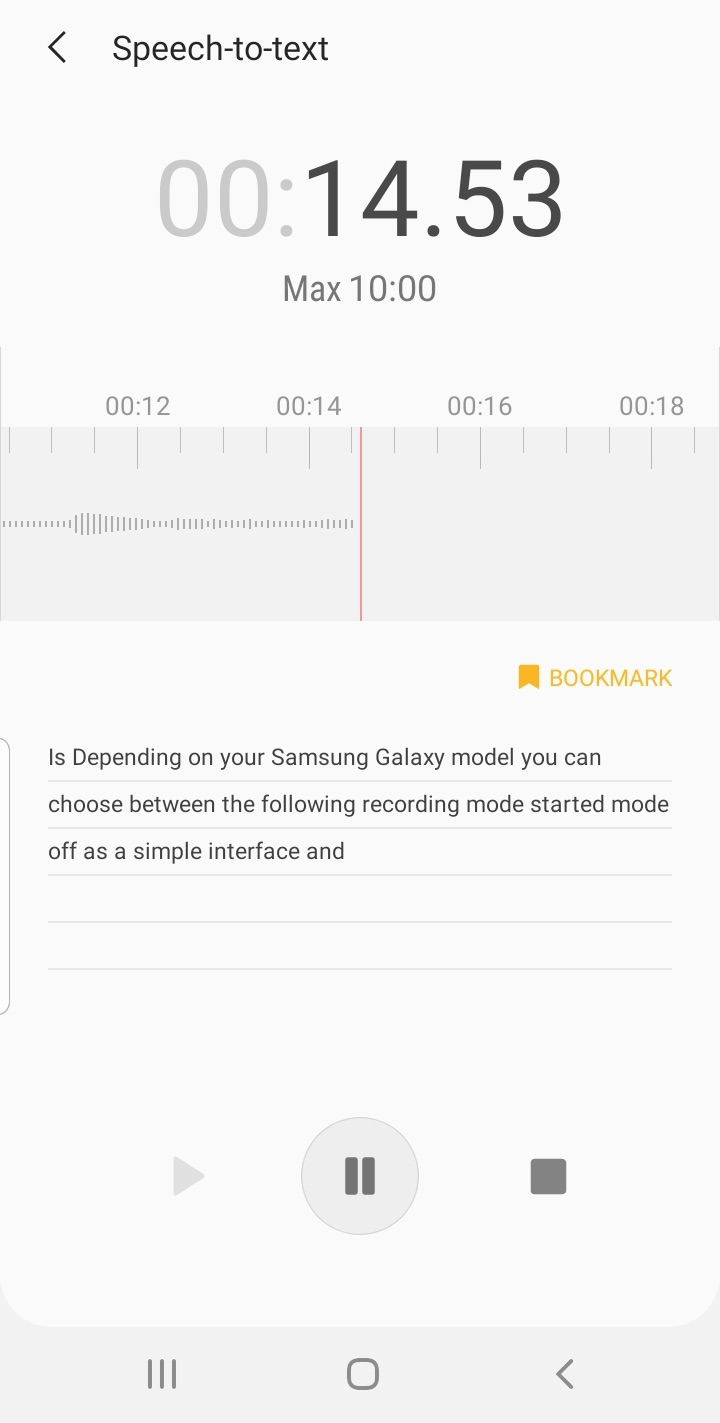
- Speech-to-text (STT) mode: Records your voice and simultaneously transcribes it to on-screen text. It has a maximum recording time of 10 minutes. Keep your Android device within 3 inches of your mouth for best results, and speak clearly.
If you’re using Voice Recorder for the first time, you’ll be prompted to allow music and audio and microphone permissions. Tap “Settings”.

Tap “Permissions”.
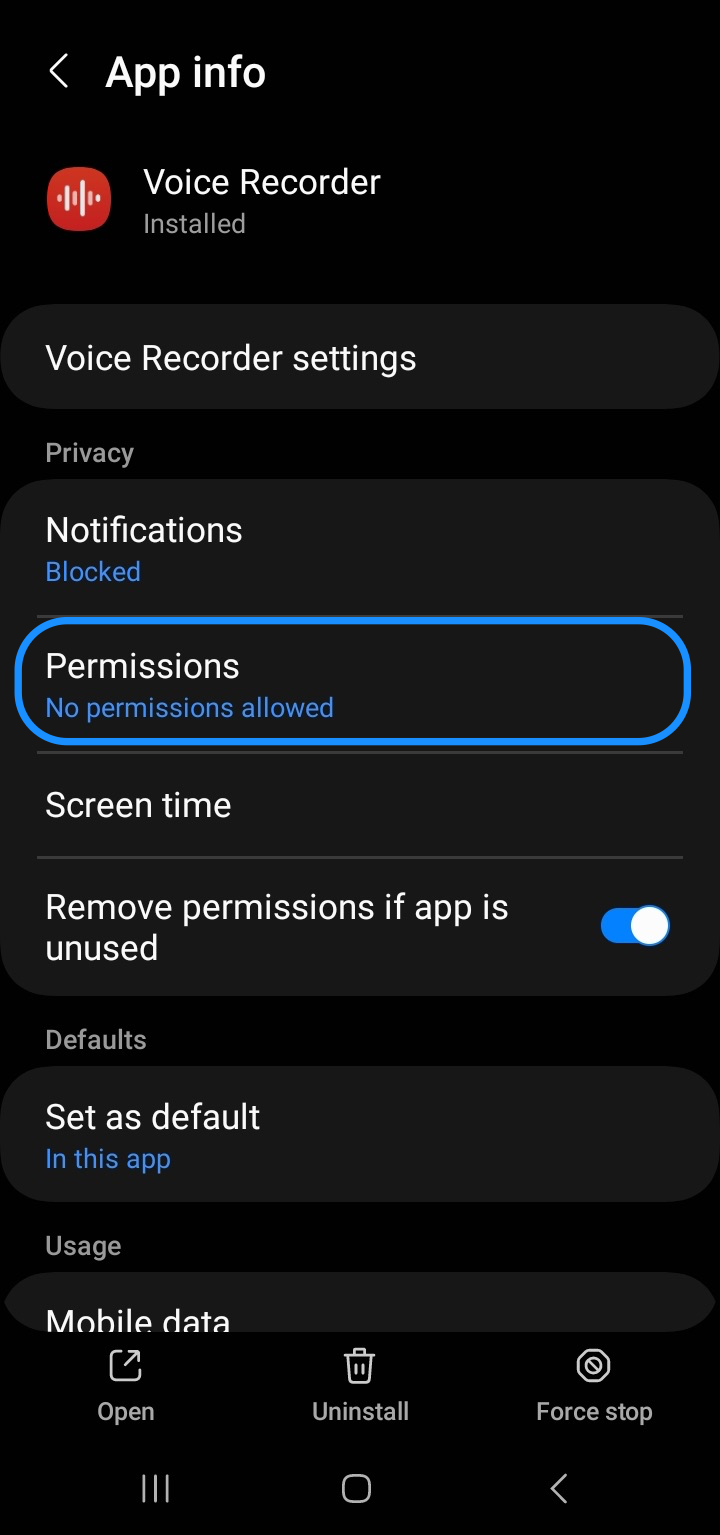
Next, tap “Microphone” and select Allow only while using the app or Ask every time.
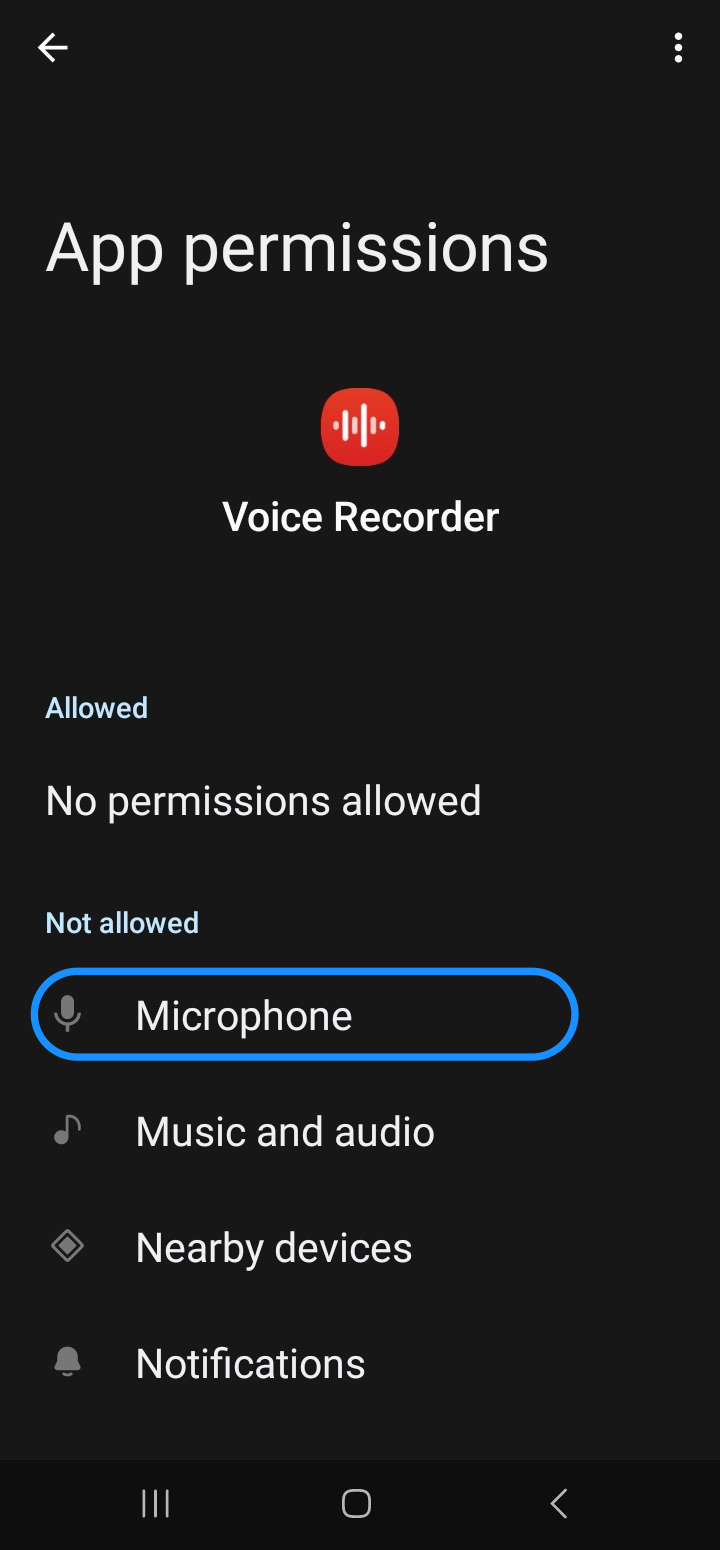
Then, tap “Music and audio” and then “Allow”.

Step 2. Adjust your settings
Tap the More button (ellipsis) in the top right corner of your screen.
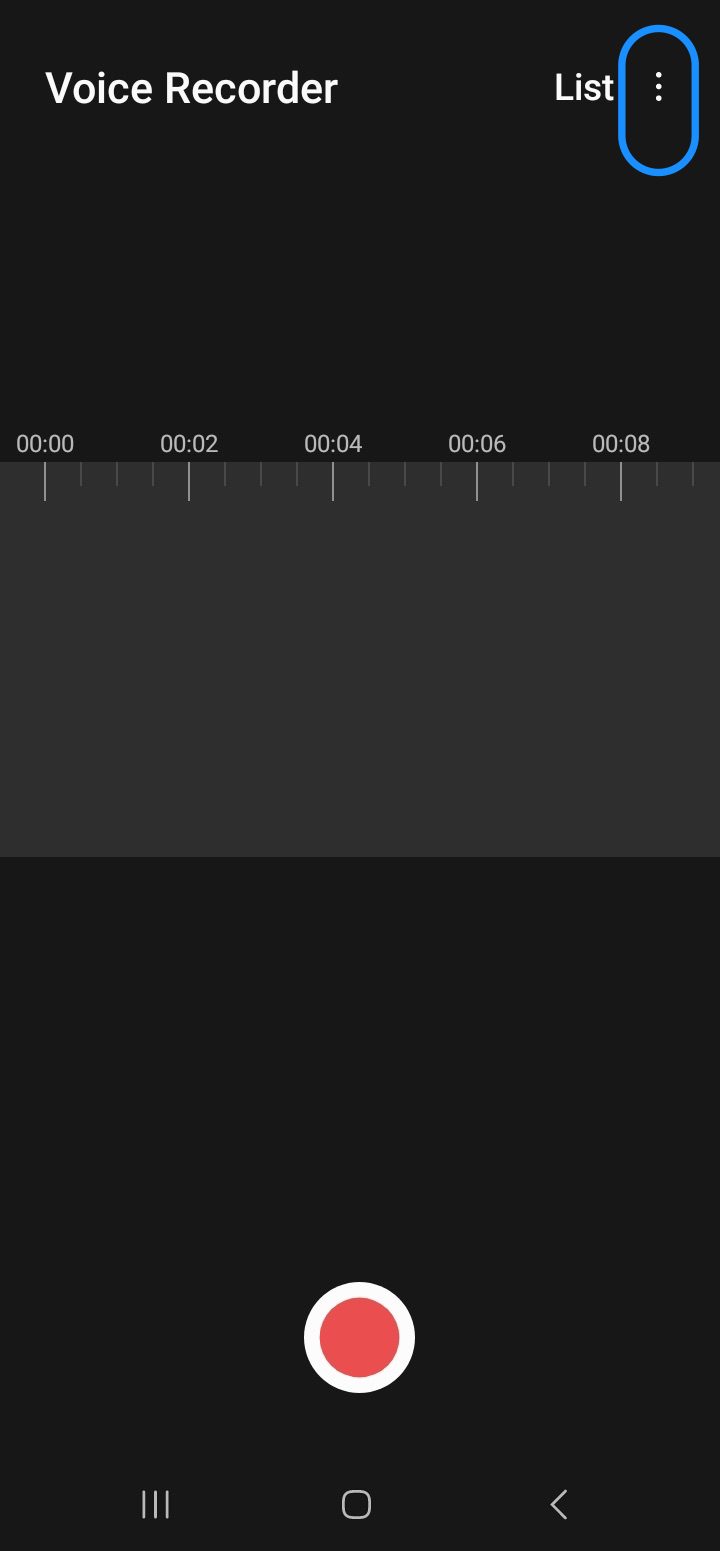
Select “Settings” to access voice recording settings.
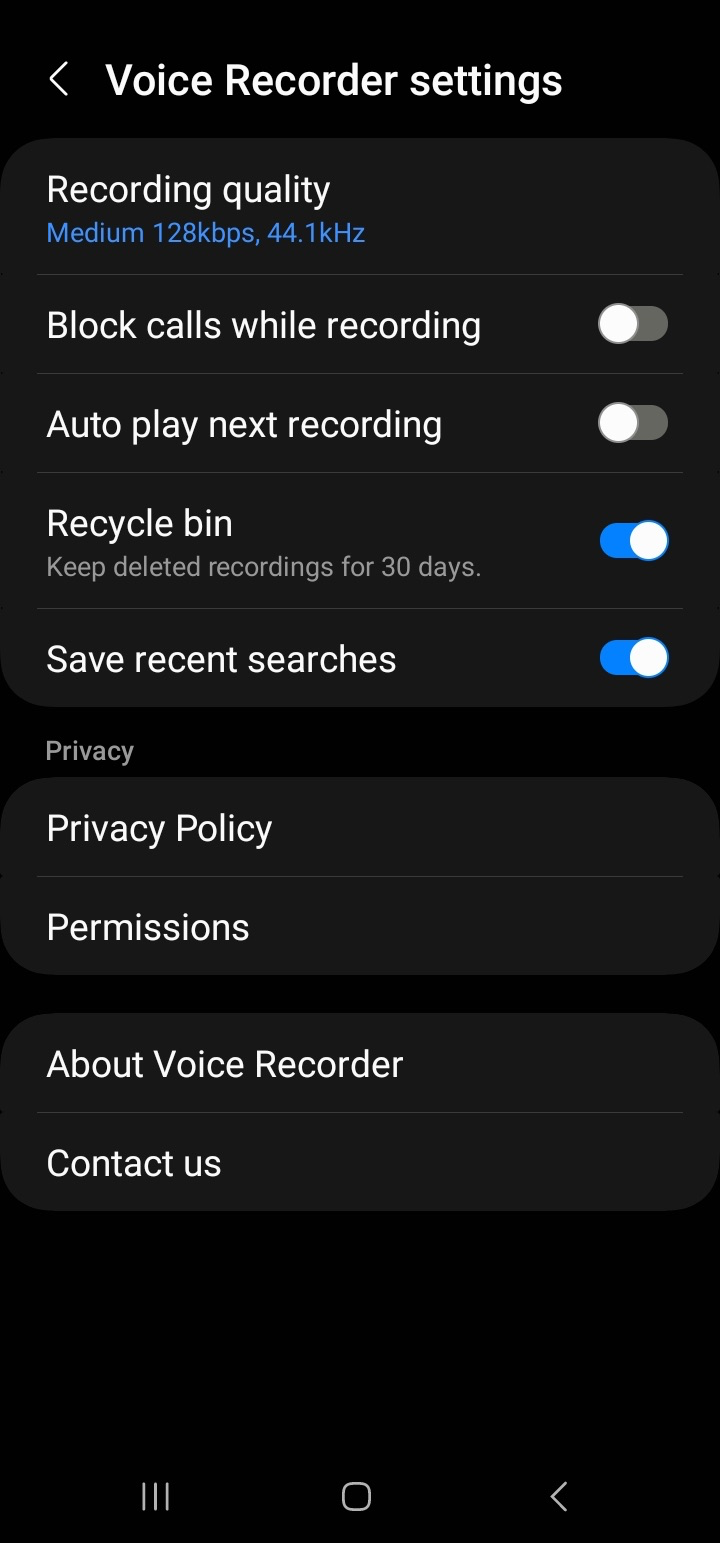
You can adjust the voice recording app settings:
- Recording quality: Choose between Low (64kbps, 44.1kHz), Mid (medium) (128kbps, 44.1kHz), or High (256kbps, 48kHz) recording quality.
- Block calls while recording: The voice recorder app will display a Call reject icon next to the timer during recording, and will automatically reject incoming calls.
- Auto play next recording: Automatically plays the next voice/audio recording.
- Deletion (Recycle bin): Keeps deleted audio recordings on your device for 30 days. If you disable the setting, all recordings in the Recycle bin will be deleted.
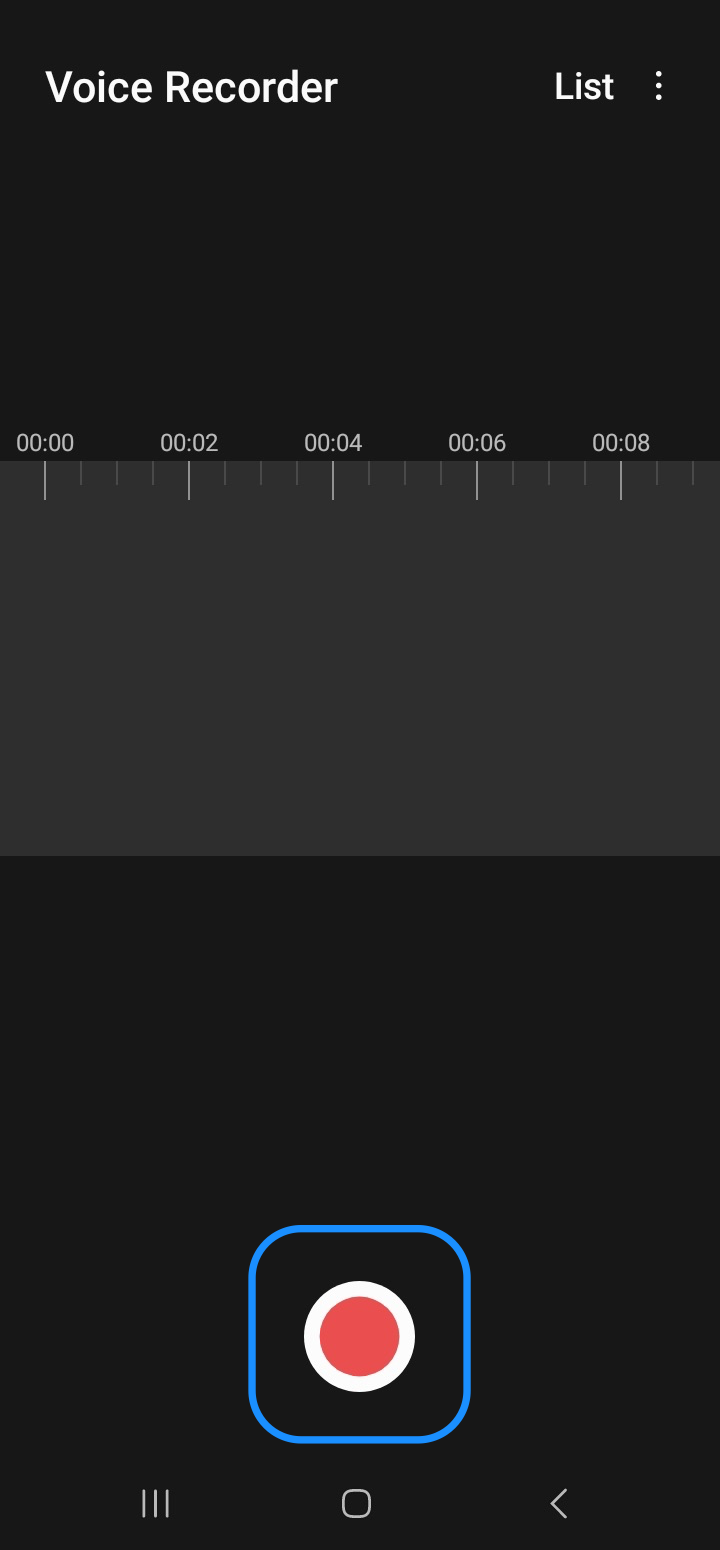
Step 3. Click on the Sound Record button
Tap the red Record button at the bottom of your screen to start recording your audio.
Note: Depending on the make and model of your Android device, you might have a Record button and/or Microphone icon. For example, if you’re using a OnePlus Android device, tap the Microphone icon at the bottom to record audio.
If you selected Standard mode, the word “Standard” will appear in the top left corner of your screen during the recording.
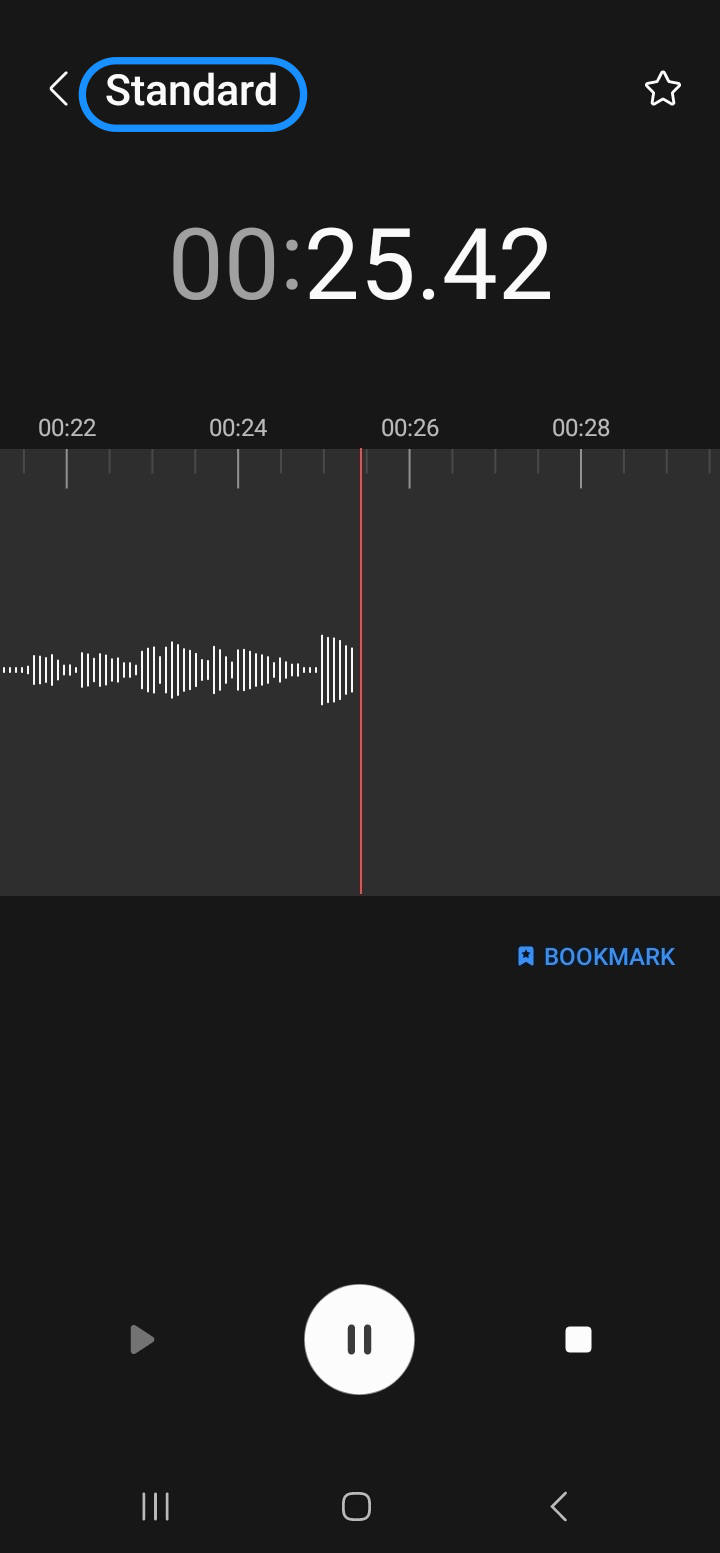
Step 4. Click on the Pause button
Tap the Pause button to stop the recording, then tap it again to resume recording.

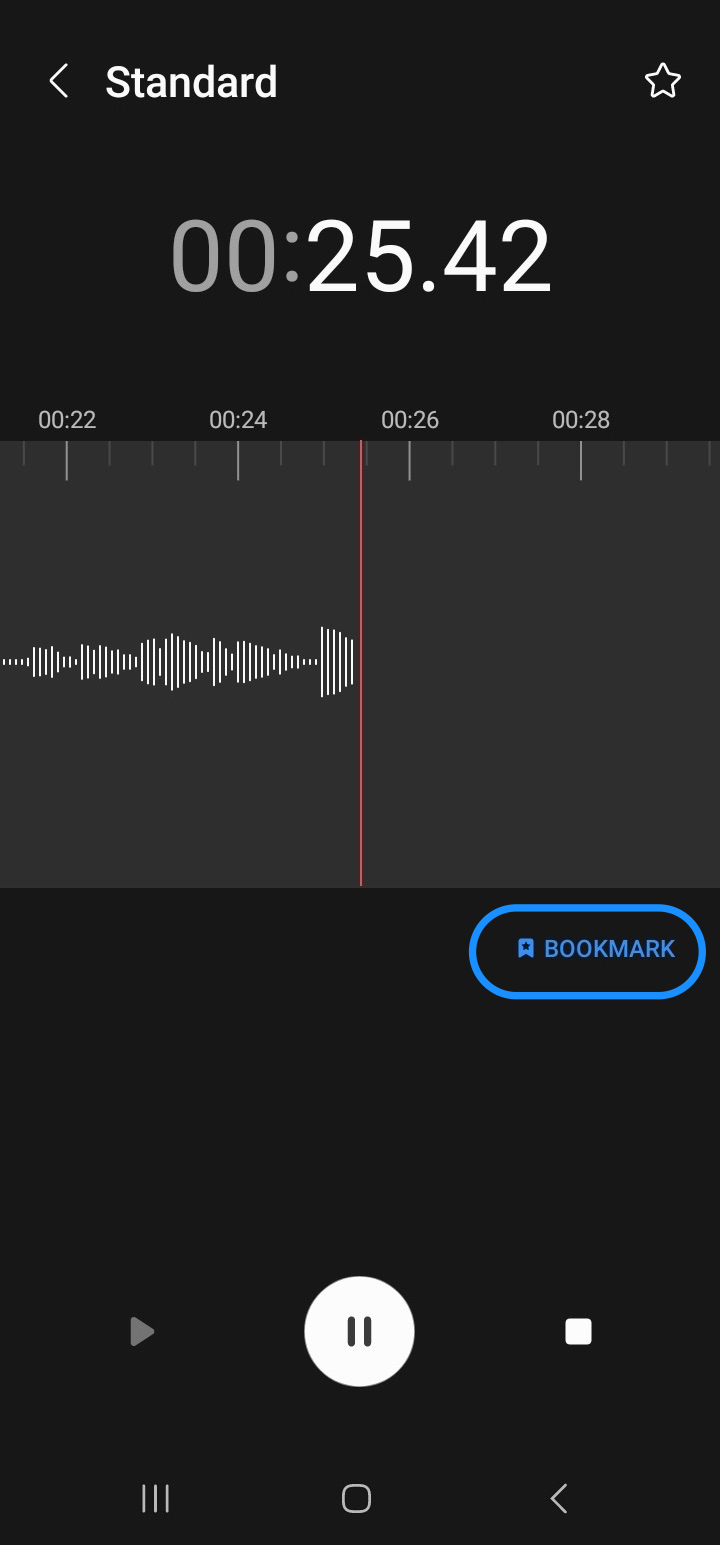
Tap the blue “Bookmark” button on the screen to place a reminder on an important part of the recording. This way, you can easily revert to the bookmarked section during playback.
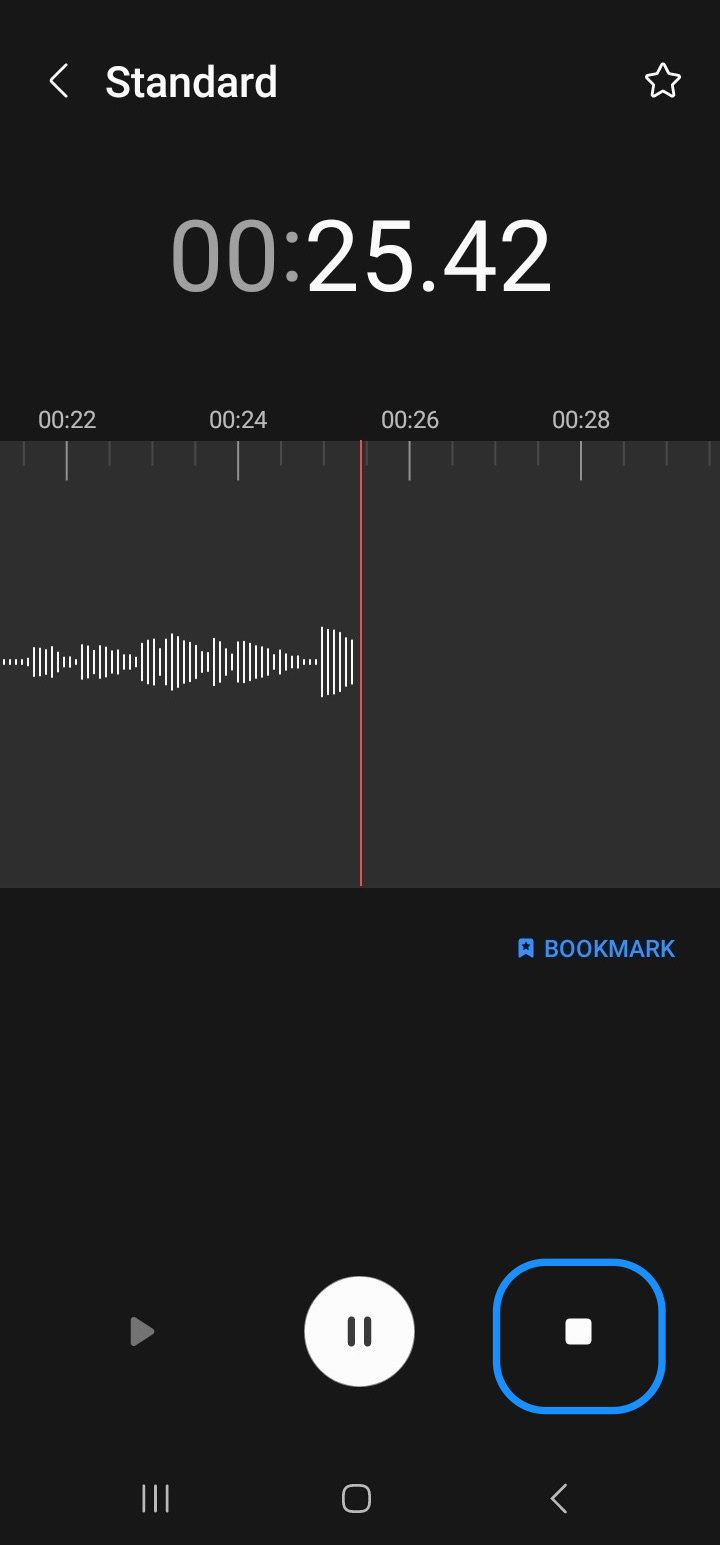
Step 5. Name and save your audio file
When you’re done recording, tap the Stop button.
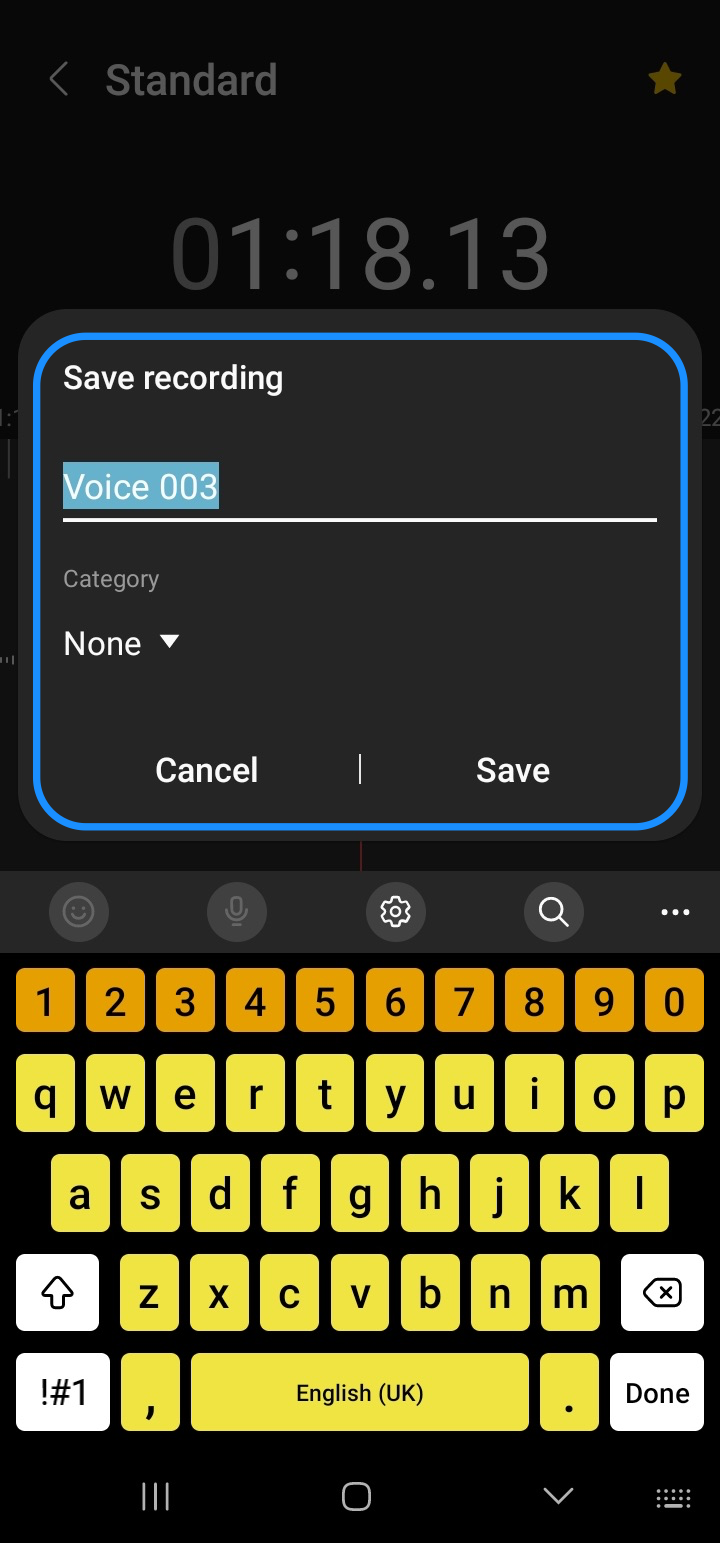
You’ll be prompted to save your recording. Name the audio file, and then tap “Save”.
Your recording will be saved to your device. Open the Voice Recorder app and tap "List" to view and playback the recording.

Tap your audio file, then tap play to listen to the recording.

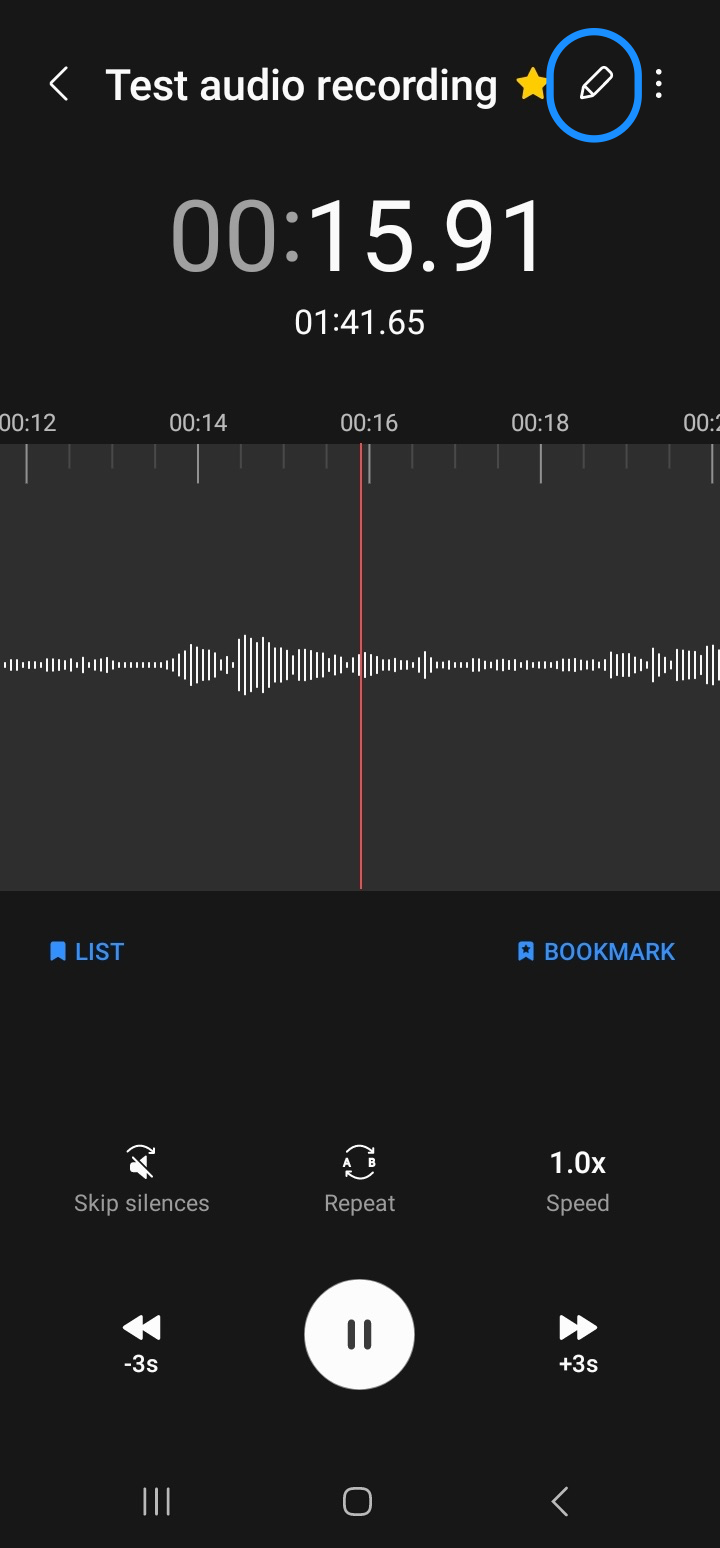
Step 6. Edit the recording
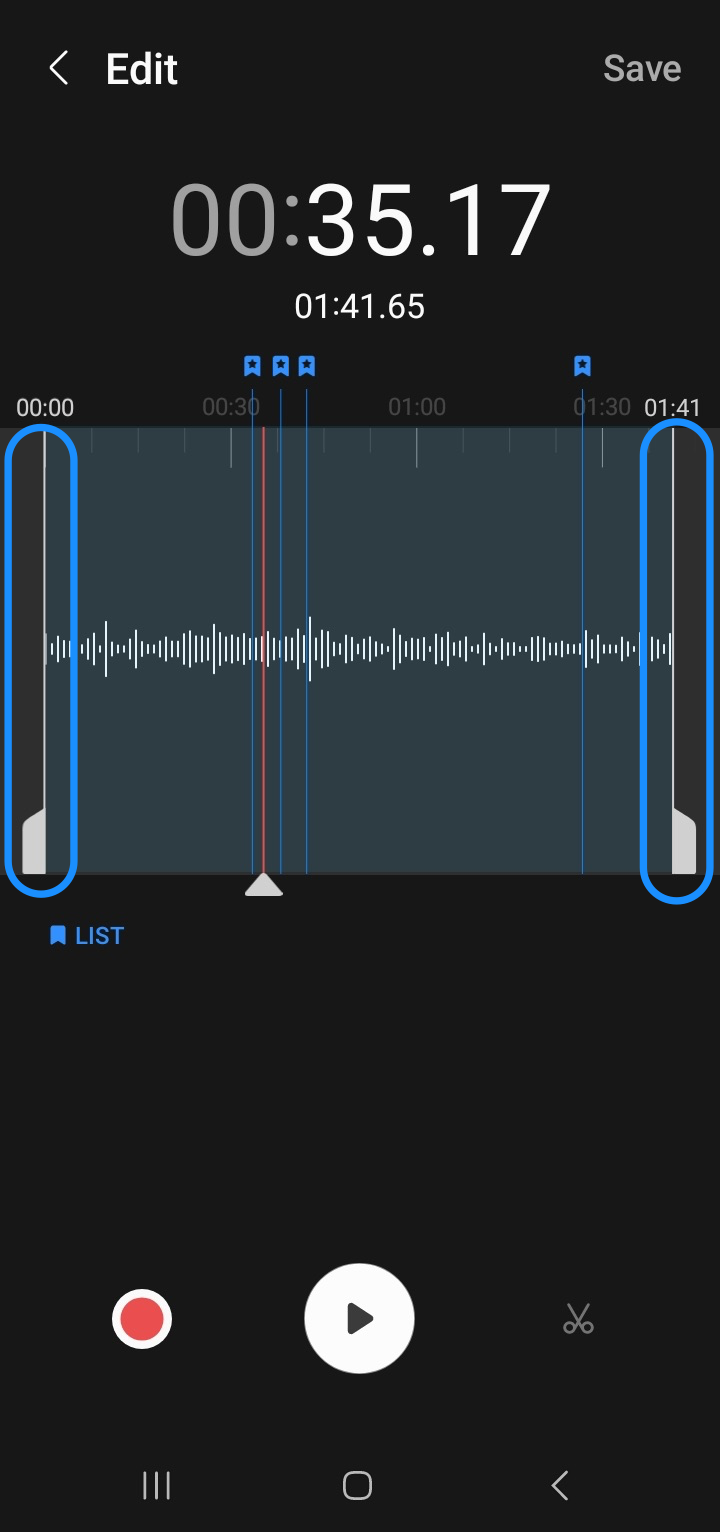
Tap the Edit (pencil) icon at the top of the screen to tweak your recording. You’ll see trim handles on either side of the waveform.
- Drag the handles to highlight the part you want to cut.
- Tap the Cut (scissors) icon at the bottom right.
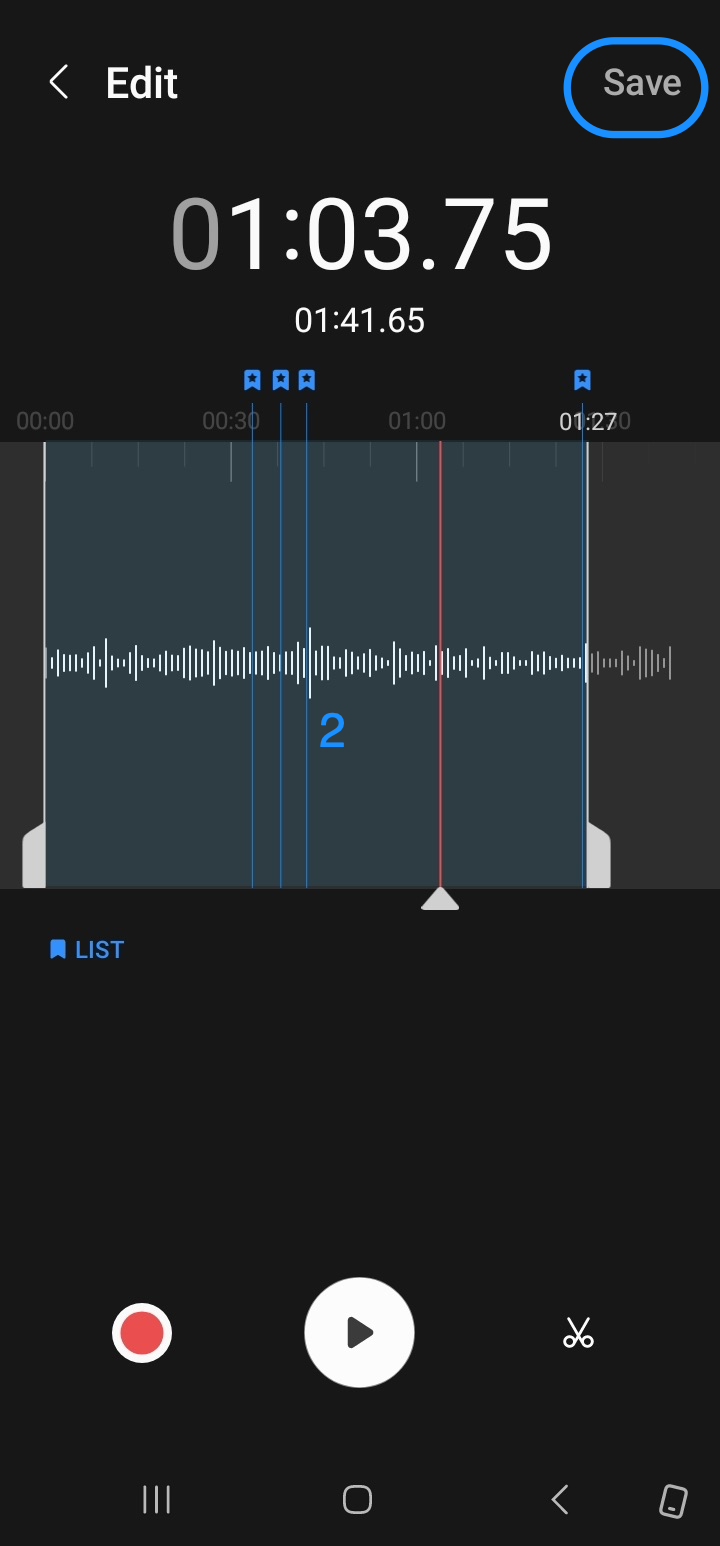
Step 7. Save and share your audio file
After you’ve edited the recording to your liking, tap “Save” to store the edited file.
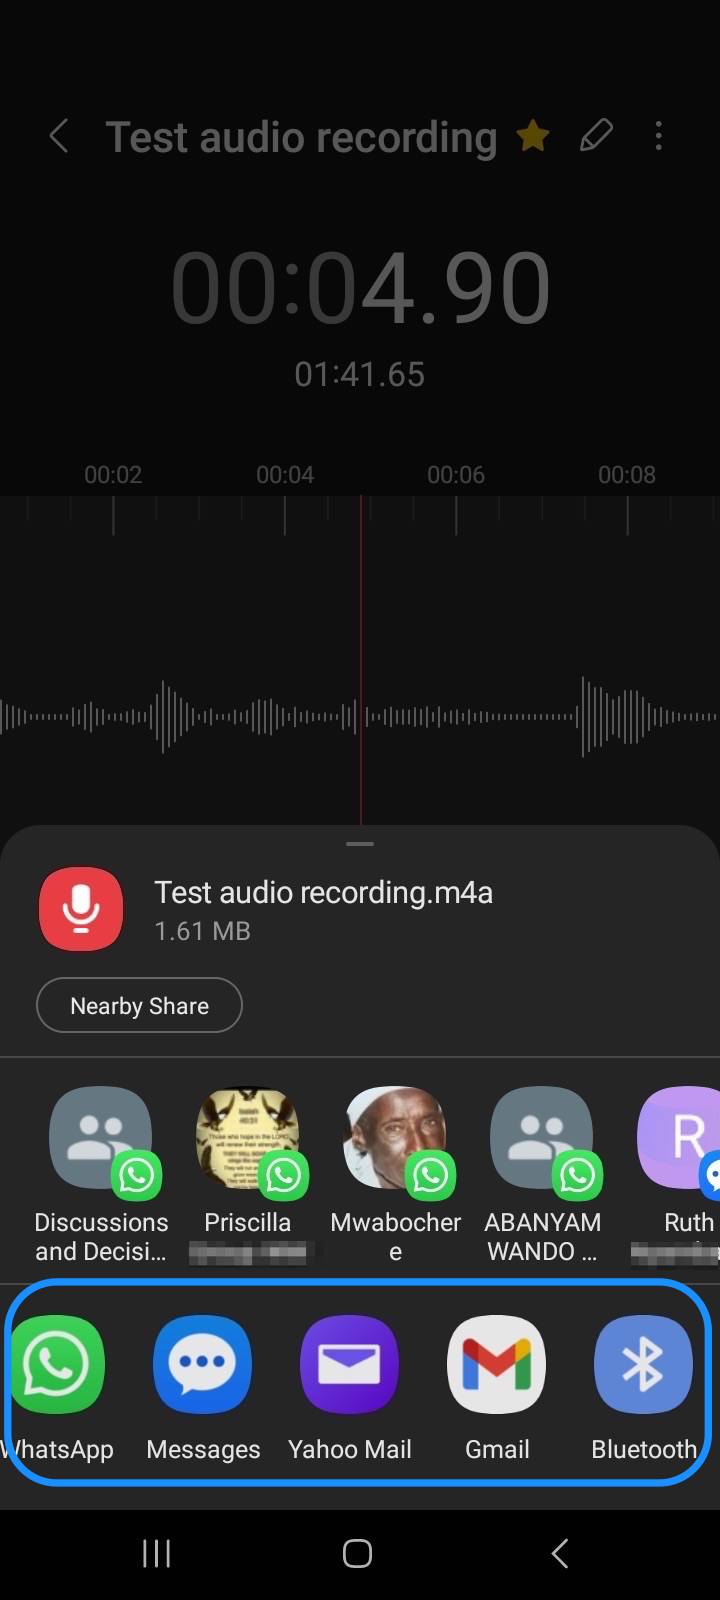
Then, tap More (ellipsis) and select “Share”. Or, long press the audio file and tap Share to share the recording with others on various applications.
Didn’t capture the perfect sound? No worries. Descript can help you improve the audio quality of your recording and turn it into professional-sounding audio in just a click of your mouse.
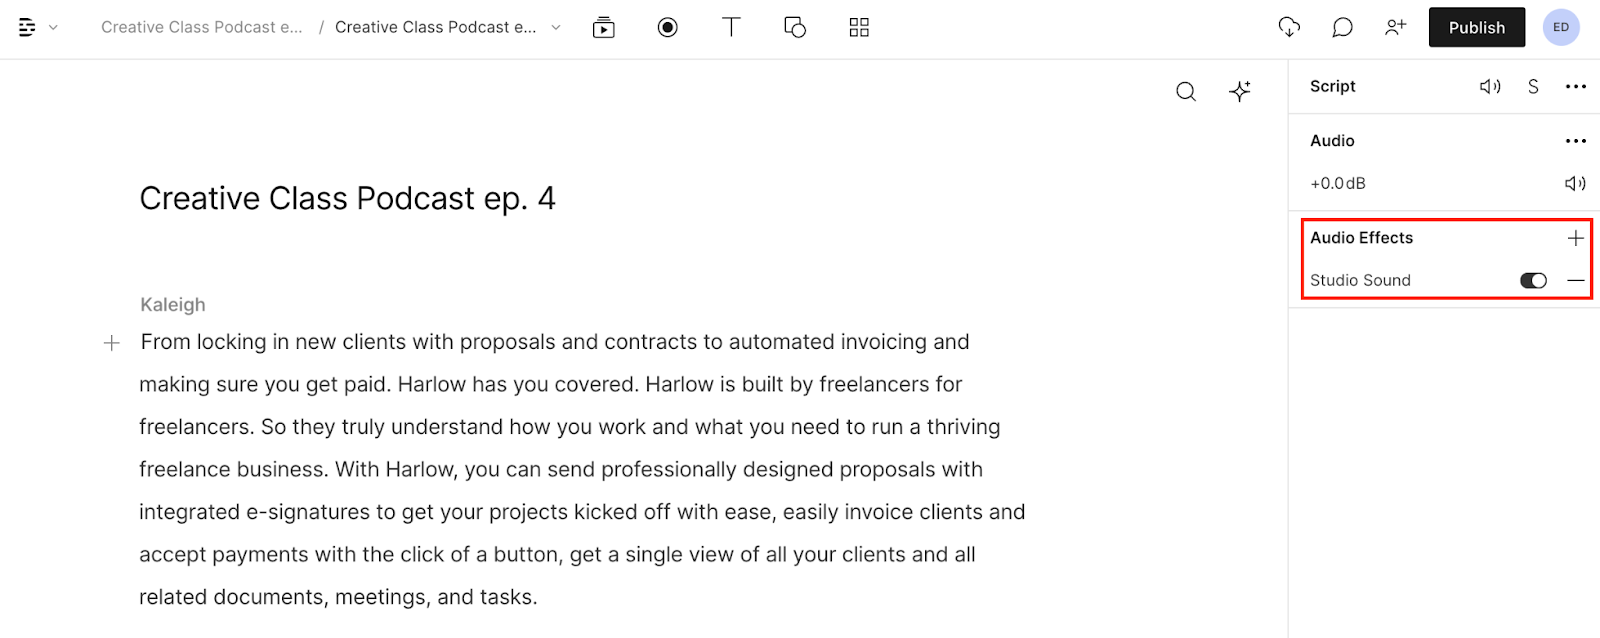
Once you import your file to Descript’s editor, navigate to Audio Effects and turn on Studio Sound. Descript will use AI to automatically remove background noise and enhance voices in the recording to make it sound as if you recorded on a professional mic in a studio.
Other professional audio enhancement and editing tools you can find in Descript include:
- Edit directly from the transcript: Delete or copy and paste a word, and your audio will change accordingly. It makes editing your audio as easy as editing a Word doc
- Filler Word Removal: Detects filler words and phrases, which you can remove to make you sound more eloquent.
- AI Voices: Creates a text-to-speech clone of your voice, making it easy to add words to your audio like a document.
3 third-party apps to record audio on Android
Most Android devices have a built-in voice recorder app, but it’s pretty limited. You can find dozens of Android apps with advanced features — gain control, background noise filters, custom formats — and they play especially nice with external mics. If you really want professional-grade clarity, pair any of these apps with a wired or Bluetooth microphone.
Here are some of our favorites:
Dolby On
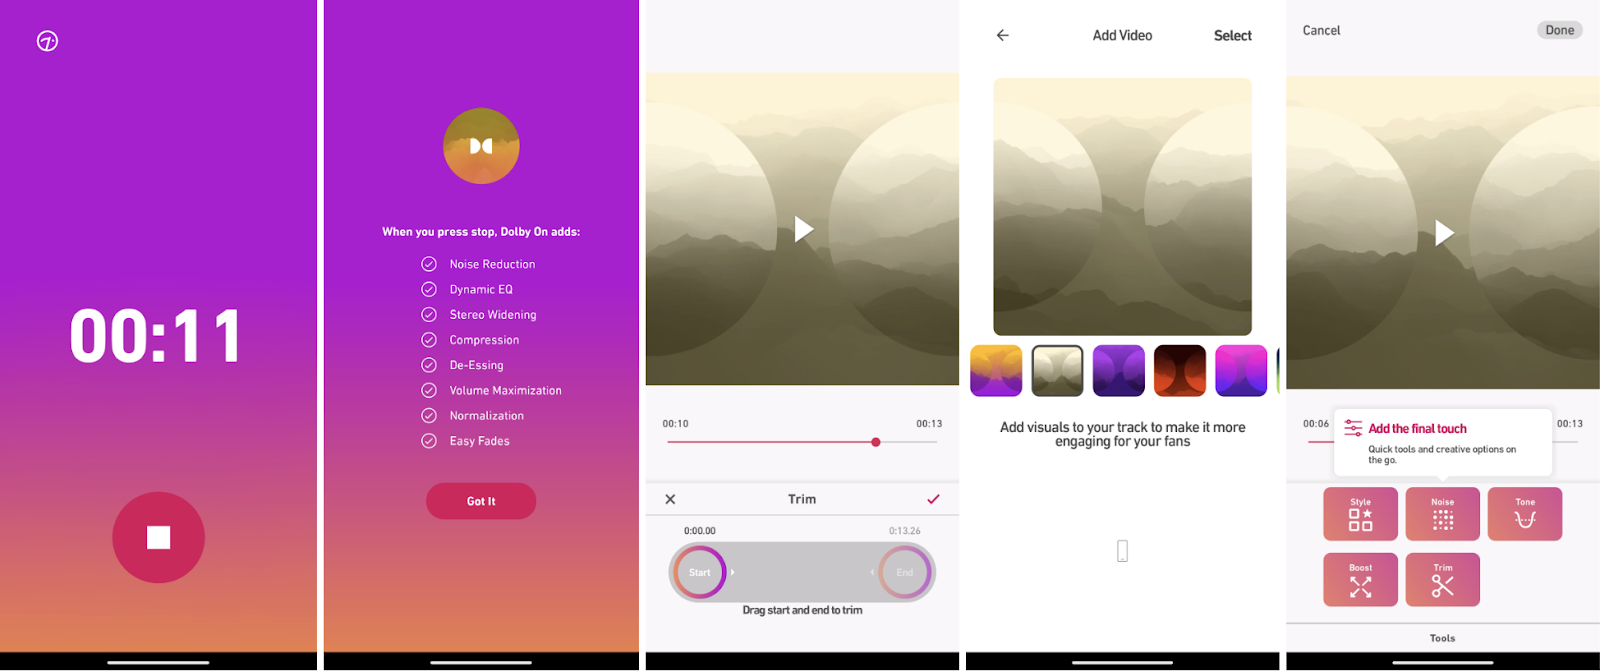
Dolby On is a free, easy voice recorder app that you can use to capture audio and create quality recordings. Here are some of Dolby On’s capabilities:
Key features:
- Record and edit audio using Dolby's advanced technology.
- Import and edit pre-recorded audio files.
- Trim recordings for professional-quality results.
Sound enhancement:
- Automatic noise reduction.
- Dynamic EQ that automatically adapts to the audio.
- Custom audio filters.
Exporting & sharing:
- Export recordings in M4A format (default) or WAV format (Lossless audio option).
- Add studio effects and animated cover art.
- Share directly on social media platforms with audio optimized for that platform.
Download Dolby On on the Google Play Store.
Samsung Voice Recorder
The Samsung Voice Recorder app comes pre-installed in most Samsung smartphones and tablets, but is also available for download on Google Play Store and the Galaxy Store.
Key features:
- Designed for simple audio recordings: voice memos, interviews, or song demos.
- Converts up to 10 minutes of speech to text for convenient transcriptions.
- Built-in editor for trimming recordings and removing unwanted portions.
- Ability to add notes or tags for better organization.
Editing & Sharing:
- Edit recordings and save the edited audio file on your device.
- Playback recordings, share via messaging apps, or store in cloud services like Google Drive or Dropbox.
Recording Modes:
- Three recording modes, including speech-to-text.
- Simultaneous transcription of voice notes to on-screen text for easy reference.
- Supports multiple audio formats: MP3, AMR, and WAV.
Download Samsung Voice Recorder on the Google Play Store.
Google Recorder
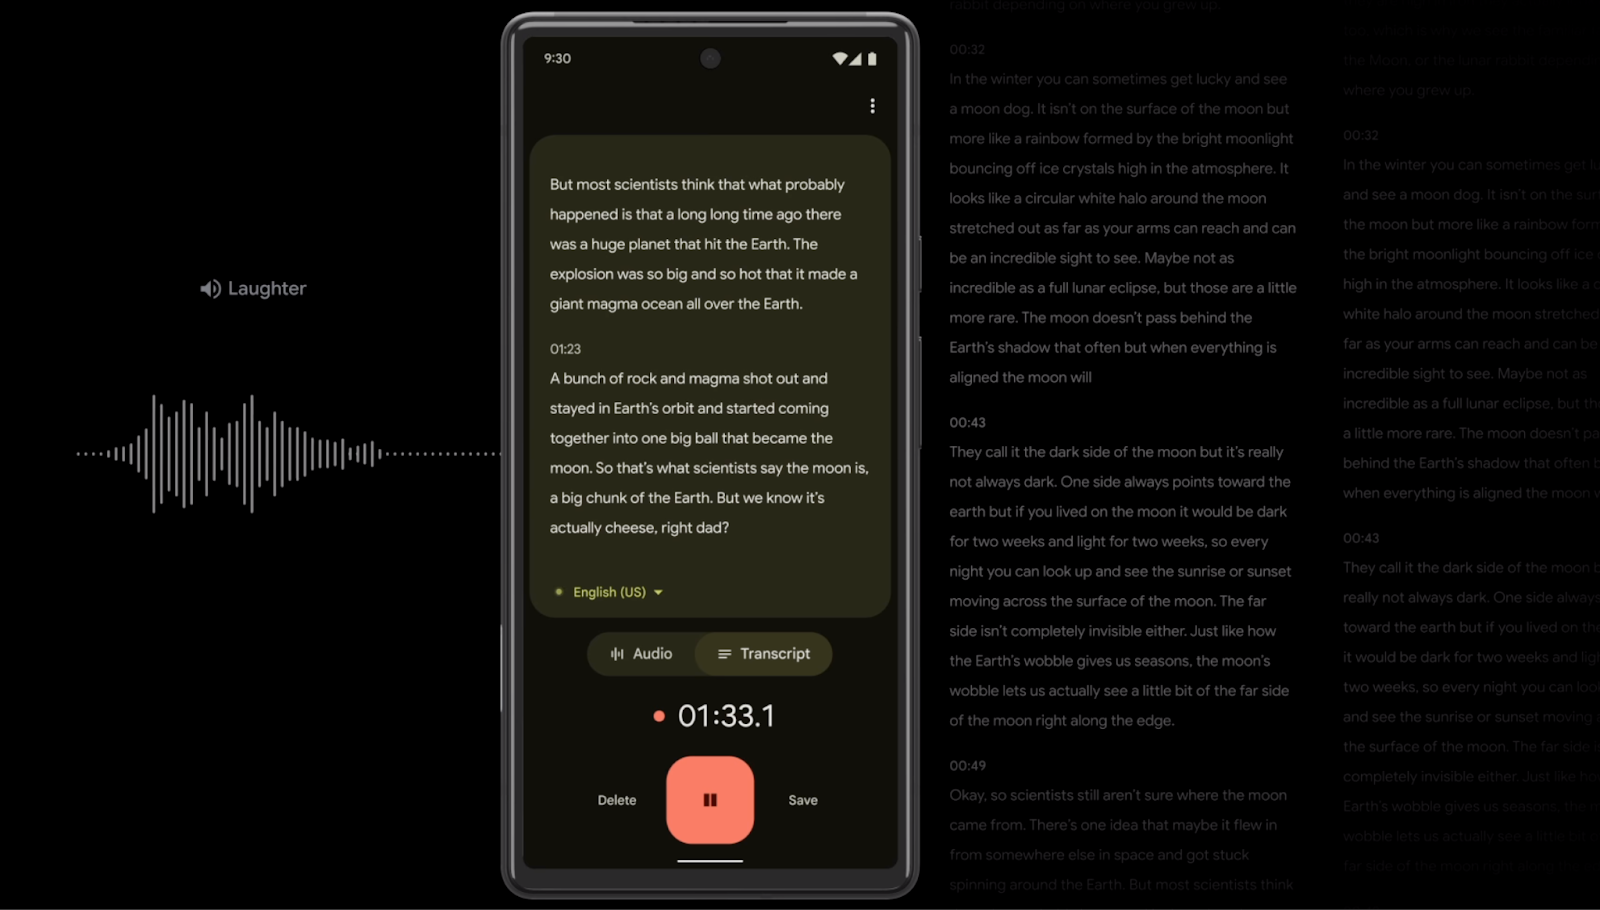
Google Recorder app is a free audio recording app only available on Google Pixel 2 or newer Pixel phones (including Pixel Fold).
Key features:
- Record up to 18 hours of audio in a single session using your Pixel phone.
- Edit, save, and share recordings directly from the app for effortless use.
- Identify and label different speakers in the audio and detect language for transcription accuracy.
Editing made easy:
- Trim recordings through the transcript interface, ensuring precision in your edits.
- Changes made in the transcript reflect in the audio file without manual adjustments.
You can access saved recordings in Recorder for web on a Windows or Mac computer, then edit and save or share the recording with others.
Download Recorder on the Google Play Store.
How to record audio on Android—FAQs
Where is the Voice Recorder on an Android phone?
You can find the Voice Recorder app in your Android app drawer. Alternatively, search the Apps option in your mobile phone's settings and search for Voice Recorder. Download a third-party voice recording app from the Google Play Store if you can't find it on your phone.
How do I record audio on a Samsung Android?
To record audio on a Samsung Android device:
- Open the Voice Recorder app.
- Tap the Record button and/or Microphone icon to start recording.
- Tap the Stop button to stop recording.
- Name and save your audio file.
- Use the editing tool to edit or trim your audio recording.
- Save the edited file to your device or share it with others.
Can I record just audio on an Android phone?
Yes. You can record audio on your Android phone or tablet. Use the built-in Voice Recorder or download a third-party audio recording app from the Google Play Store.
How do I record high-quality audio on my Android phone?
To get dependable, clear sound, start by recording in a quiet place and disable notifications to avoid phone alerts. For best results, use a wired microphone or headset that supports 48kHz. Bluetooth mics often add latency and can limit audio quality. Hold the phone or mic about six inches from your mouth, or position it so that it clearly captures the sound source without clipping. Once you’ve recorded, you can import the file to Descript, turn on Studio Sound, and let Descript reduce background noise and boost vocal clarity. Doing a quick test recording is always a good idea to catch any audio problems early.